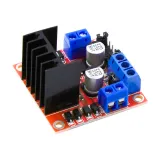
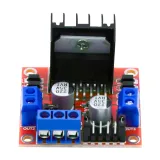
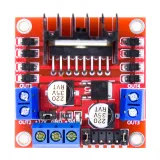
SKU: OT2099-B41 Artikelnummer: AA034 EAN: 8720589817425

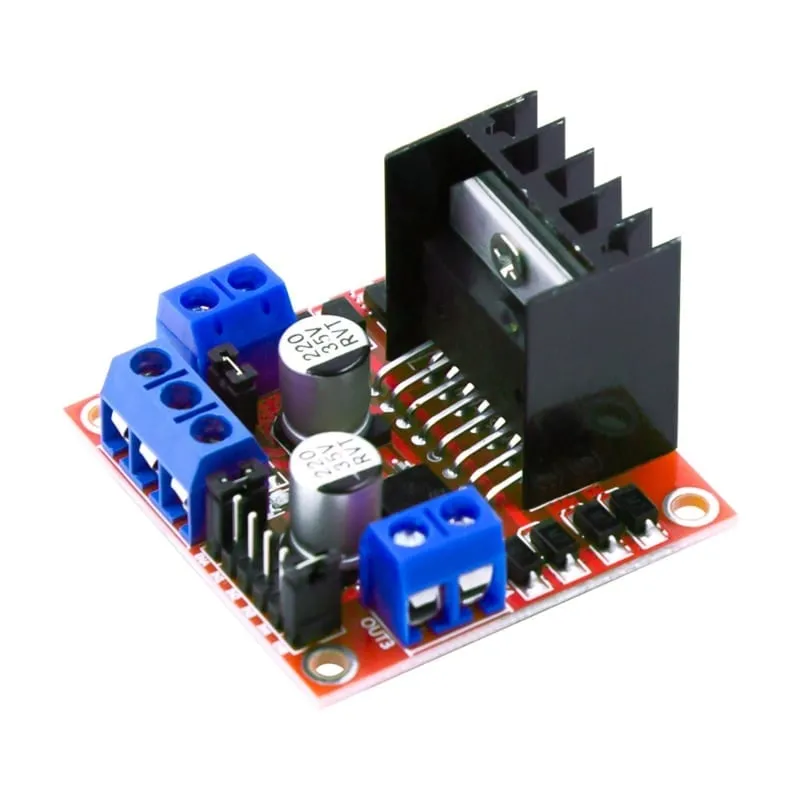
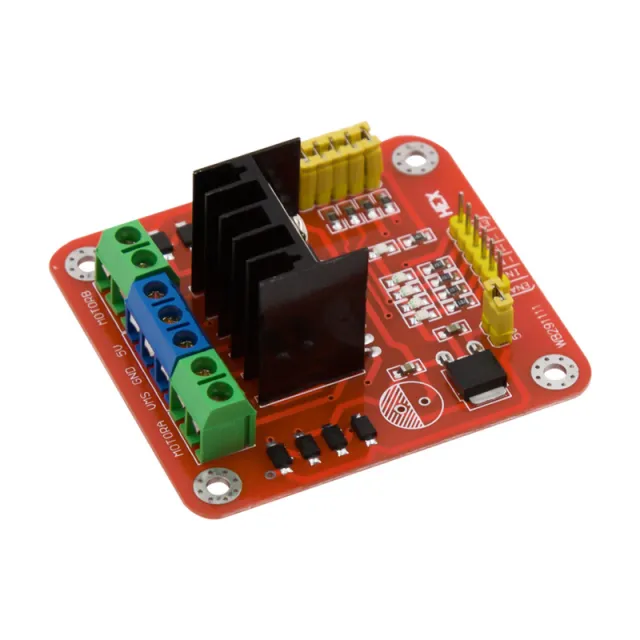
Mit diesem L298N Motor Driver Board können Sie ganz einfach DC-Motoren und Schrittmotoren mit beispielsweise einem Arduino, ESP32, Raspberry Pi, Mikrocontroller oder einem anderen digitalen Steuersystem ansteuern.
Das Modul basiert auf dem bekannten L298N Dual H-Bridge Motortreiber. Dank der zwei integrierten H-Brücken können Sie zwei gewöhnliche gebürstete DC-Motoren unabhängig voneinander ansteuern, einschließlich Drehrichtung und Geschwindigkeitsregelung. Außerdem kann das Modul zum Ansteuern eines bipolaren Schrittmotors verwendet werden.
Die Motorversorgung kann gemäß den Spezifikationen dieses Moduls zwischen 5 und 35 V DC liegen. Die Logik arbeitet mit 5 V. Der L298N unterstützt unter geeigneten Bedingungen einen Strom von bis zu 2 A pro Kanal, wobei bei höheren Lasten eine gute Kühlung wichtig ist.
Der L298N ist nicht nur für Schrittmotoren gedacht. Das Board eignet sich hervorragend zur Regelung gewöhnlicher gebürsteter DC-Motoren.
Mit einem Modul können maximal zwei DC-Motoren separat angesteuert werden:
Über die digitalen Eingänge können Sie die Drehrichtung jedes Motors bestimmen. Über die ENA- und ENB-Anschlüsse kann außerdem ein PWM-Signal angelegt werden, um die Drehzahl der Motoren zu regeln.
Dadurch sind unter anderem folgende Funktionen möglich:
Damit eignet sich das Modul unter anderem für Roboterautos, Fahrzeuge, kleine Maschinen, Aktoren, Lüfter und andere Projekte mit DC-Motoren.
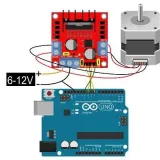
Die zwei H-Brücken können auch gemeinsam zum Ansteuern eines bipolaren Schrittmotors verwendet werden. Die vier Motorausgänge OUT1 bis OUT4 werden dafür an die beiden Spulen des Schrittmotors angeschlossen.
Die Reihenfolge, in der IN1 bis IN4 angesteuert werden, bestimmt anschließend die Drehrichtung und das Schrittmuster.
Für DC-Motoren kann die Drehzahl über PWM (Pulse Width Modulation) geregelt werden.
Dafür werden die Jumper von ENA und/oder ENB entfernt und diese Anschlüsse mit einem PWM-Ausgang des Mikrocontrollers verbunden.
Wenn der betreffende Jumper gesteckt bleibt, ist der Kanal dauerhaft eingeschaltet und der Motor kann über die IN-Pins ohne separates PWM-Signal angesteuert werden.
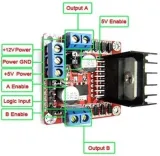
Motorversorgung / VS
Anschluss für die Versorgungsspannung der Motoren.
GND
Gemeinsame Masse für Versorgung und Steuerung. Die GND des Mikrocontrollers und des Motortreibers müssen miteinander verbunden sein.
5V
5V-Anschluss für die Logik des Moduls. Je nach Konfiguration des 5V-Reglers und Jumpers kann dieser Anschluss als Versorgungseingang oder -ausgang funktionieren.
OUT1 / OUT2
Ausgang der H-Brücke A. Hier wird DC-Motor A angeschlossen.
IN1 / IN2
Digitale Steuereingänge, mit denen die Drehrichtung von Motor A bestimmt wird.
ENA
Enable-Eingang von Motor A. Kann auch für die PWM-Geschwindigkeitsregelung verwendet werden.
OUT3 / OUT4
Ausgang der H-Brücke B. Hier wird DC-Motor B angeschlossen.
IN3 / IN4
Digitale Steuereingänge, mit denen die Drehrichtung von Motor B bestimmt wird.
ENB
Enable-Eingang von Motor B. Kann auch für die PWM-Geschwindigkeitsregelung verwendet werden.
| ENA | IN1 | IN2 | Funktion |
|---|---|---|---|
| HIGH | HIGH | LOW | Drehrichtung 1 |
| HIGH | LOW | HIGH | Drehrichtung 2 |
| HIGH | LOW | LOW | Stopp/Bremse |
| HIGH | HIGH | HIGH | Stopp/Bremse |
| LOW | X | X | Ausgang deaktiviert |
Die tatsächliche Drehrichtung hängt davon ab, wie die beiden Motorkabel an OUT1 und OUT2 angeschlossen sind.
Für Motor B funktioniert die Ansteuerung auf die gleiche Weise über IN3, IN4 und ENB.
Der verwendete L298N ist ein Dual Full-Bridge-Treiber, der speziell für das Schalten induktiver Lasten wie DC-Motoren, Schrittmotoren, Relais und Solenoide entwickelt wurde. Der L298 selbst unterstützt laut Hersteller eine Motorversorgungsspannung bis 46 V und verfügt unter anderem über einen thermischen Schutz.
Bei diesem kompletten Modul wird eine Motorversorgungsspannung von 5 bis 35 V DC verwendet.
Der angegebene maximale Strom von 2 A ist als maximaler Treiberwert zu verstehen. Bei höheren Dauerströmen der Motoren entsteht im L298N erhebliche Wärmeentwicklung. Der praktisch nutzbare Dauerstrom hängt daher unter anderem von Versorgungsspannung, Kühlung, Umgebungstemperatur und Last ab.
Prüfen Sie außerdem nicht nur den Nennstrom eines DC-Motors, sondern auch den Anlauf- und Blockierstrom (stall current). Dieser kann um ein Vielfaches höher sein als der Strom im normalen Betrieb.
Der L298N verwendet bipolare Ausgangstransistoren und hat dadurch einen größeren Spannungsabfall als moderne MOSFET-Motortreiber. Die Spannung, die tatsächlich am Motor ankommt, ist daher geringer als die angelegte Versorgungsspannung.
Dies ist besonders bei Niederspannungsmotoren relevant. Für Anwendungen, bei denen ein sehr hoher Wirkungsgrad oder ein sehr geringer Spannungsabfall wichtig ist, kann ein moderner MOSFET-Treiber die bessere Wahl sein.
Das L298N Motor Driver Board ist eine vielseitige doppelte H-Brücke zum Ansteuern sowohl gewöhnlicher DC-Motoren als auch Schrittmotoren. Mit einem Modul können zwei DC-Motoren unabhängig vorwärts und rückwärts angesteuert und die Drehzahl per PWM geregelt werden. Alternativ können beide H-Brücken gemeinsam für einen bipolaren Schrittmotor verwendet werden.
Dank der einfachen digitalen Steuerung eignet sich dieses Modul hervorragend für den Einsatz mit Arduino, ESP32 und anderen Mikrocontrollern.
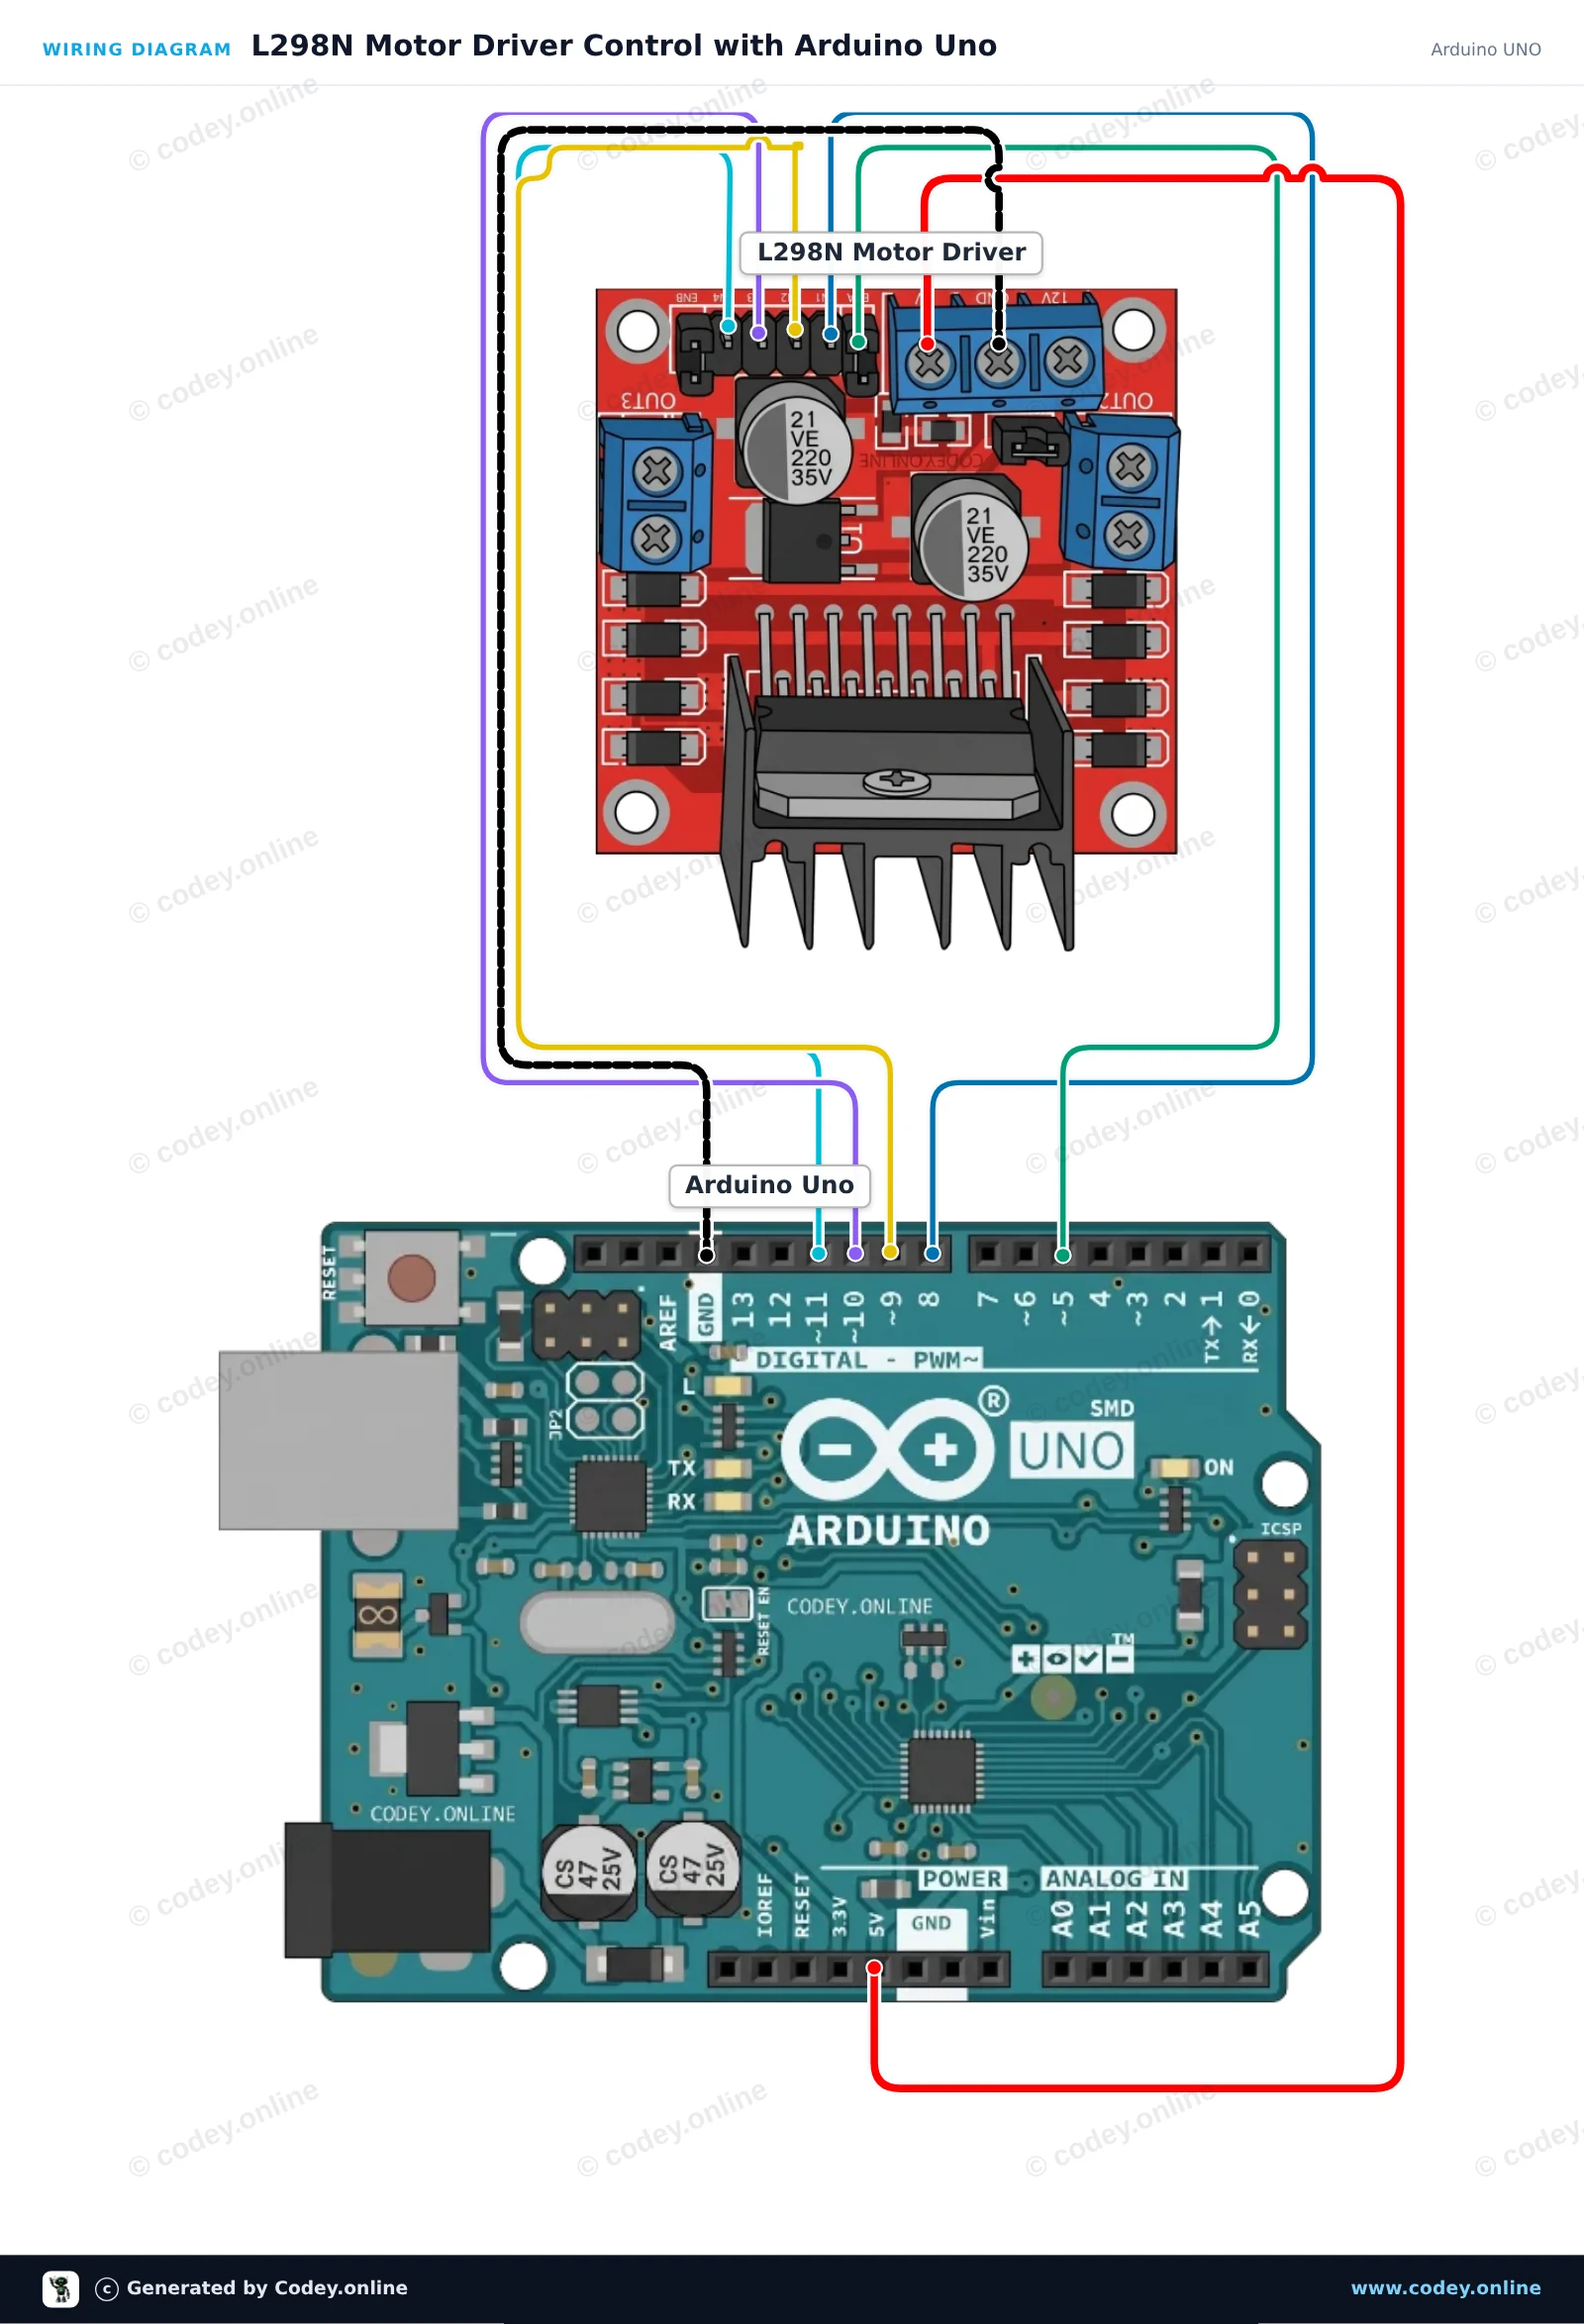
So schließt du den L298N Motor Driver Board rot an einen Arduino UNO oder ESP32 an, mit einem Beispiel-Sketch, den du direkt hochladen kannst.
Dieses Beispiel zeigt, wie man DC-Motoren mit einer L298N-Motortreiberplatine steuert. Der Arduino legt die Drehrichtung der Motoren über digitale Logik-Pins fest und passt die Motordrehzahl mit PWM am Enable-Pin an. Das Programm lässt die Motoren zuerst vorwärts laufen, stoppt sie und fährt sie dann rückwärts.
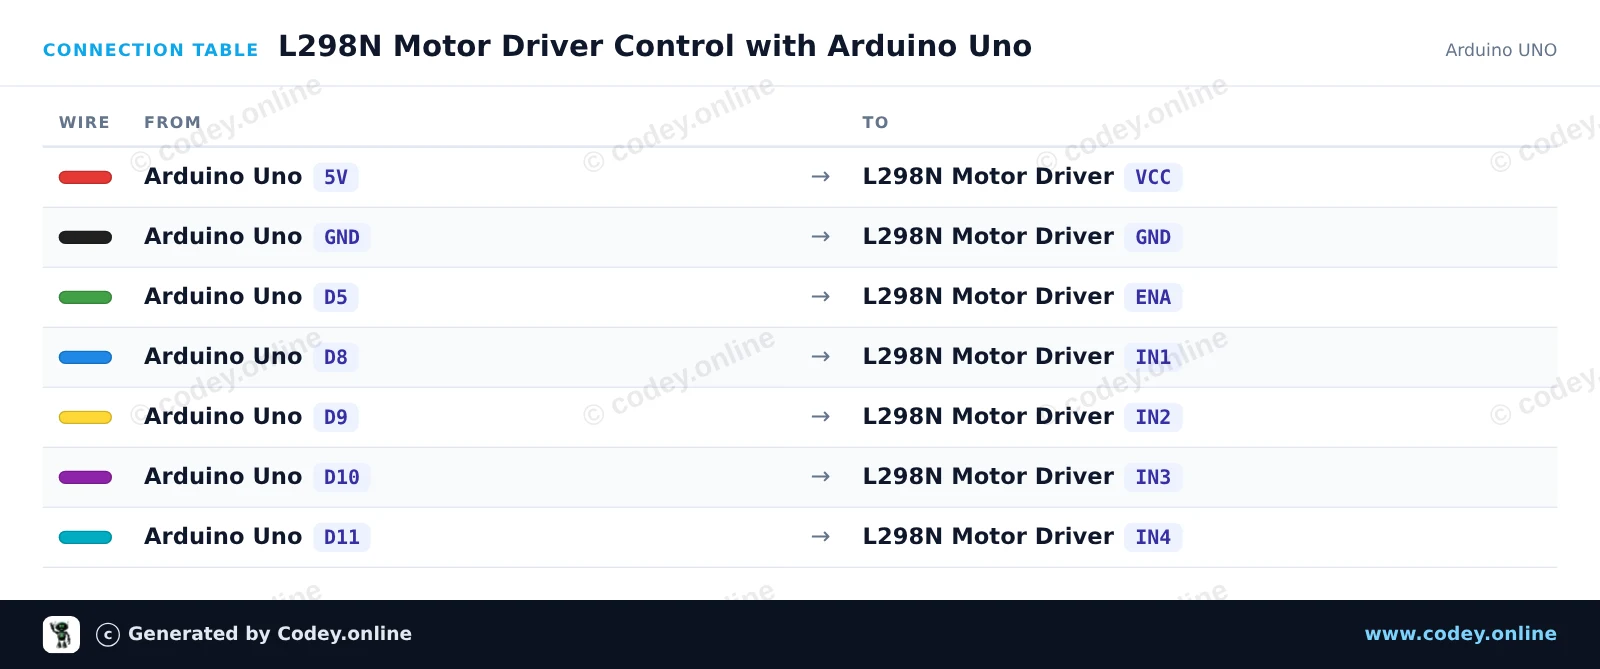
/*
 * ==================================================================
 *  Generated by Codey.online  —  https://www.codey.online
 * ==================================================================
 *  Project   : L298N Motor Driver Control with Arduino Uno
 *  Board     : Arduino UNO (arduino:avr:uno)
 *  Parts     : L298N Motor Driver Board
 *  Libraries : none (built-in)
 *
 *  Codey Online is an AI-powered browser IDE for Arduino and ESP32.
 *  Describe your project and Codey writes the code, draws the wiring
 *  diagram and uploads it to your board, straight from the browser.
 *  This code is free to use, modify and share, without warranty.
 * ==================================================================
 */

// L298N Motor Driver Control Demo

const int ENA_PIN = 5;   // PWM speed control
const int IN1_PIN = 8;   // Motor A direction 1
const int IN2_PIN = 9;   // Motor A direction 2
const int IN3_PIN = 10;  // Motor B direction 1
const int IN4_PIN = 11;  // Motor B direction 2

void stopMotors() {
  digitalWrite(IN1_PIN, LOW);
  digitalWrite(IN2_PIN, LOW);
  digitalWrite(IN3_PIN, LOW);
  digitalWrite(IN4_PIN, LOW);
  analogWrite(ENA_PIN, 0);
}

void driveForward(int speedVal) {
  digitalWrite(IN1_PIN, HIGH);
  digitalWrite(IN2_PIN, LOW);
  digitalWrite(IN3_PIN, HIGH);
  digitalWrite(IN4_PIN, LOW);
  analogWrite(ENA_PIN, speedVal);
}

void driveReverse(int speedVal) {
  digitalWrite(IN1_PIN, LOW);
  digitalWrite(IN2_PIN, HIGH);
  digitalWrite(IN3_PIN, LOW);
  digitalWrite(IN4_PIN, HIGH);
  analogWrite(ENA_PIN, speedVal);
}

void setup() {
  Serial.begin(115200);
  pinMode(ENA_PIN, OUTPUT);
  pinMode(IN1_PIN, OUTPUT);
  pinMode(IN2_PIN, OUTPUT);
  pinMode(IN3_PIN, OUTPUT);
  pinMode(IN4_PIN, OUTPUT);

  stopMotors();
  Serial.println(F("L298N Motor Driver initialized."));
}

void loop() {
  Serial.println(F("Driving forward"));
  driveForward(200);
  delay(2000);

  Serial.println(F("Stopping"));
  stopMotors();
  delay(1000);

  Serial.println(F("Driving reverse"));
  driveReverse(200);
  delay(2000);

  Serial.println(F("Stopping"));
  stopMotors();
  delay(1000);
}Wiring diagram and example code generated by Codey.online — https://www.codey.online
Dieses Projekt steuert zwei DC-Motoren mit einem ESP32 und einem L298N H-Brücken-Treiber. Der Sketch lässt beide Motoren vorwärts laufen, stoppt sie, bewegt sie rückwärts und demonstriert die PWM-Drehzahlregelung. Schließe eine externe Stromversorgung an den 12V-Anschluss des L298N an, um ausreichend Strom für größere Motoren bereitzustellen.
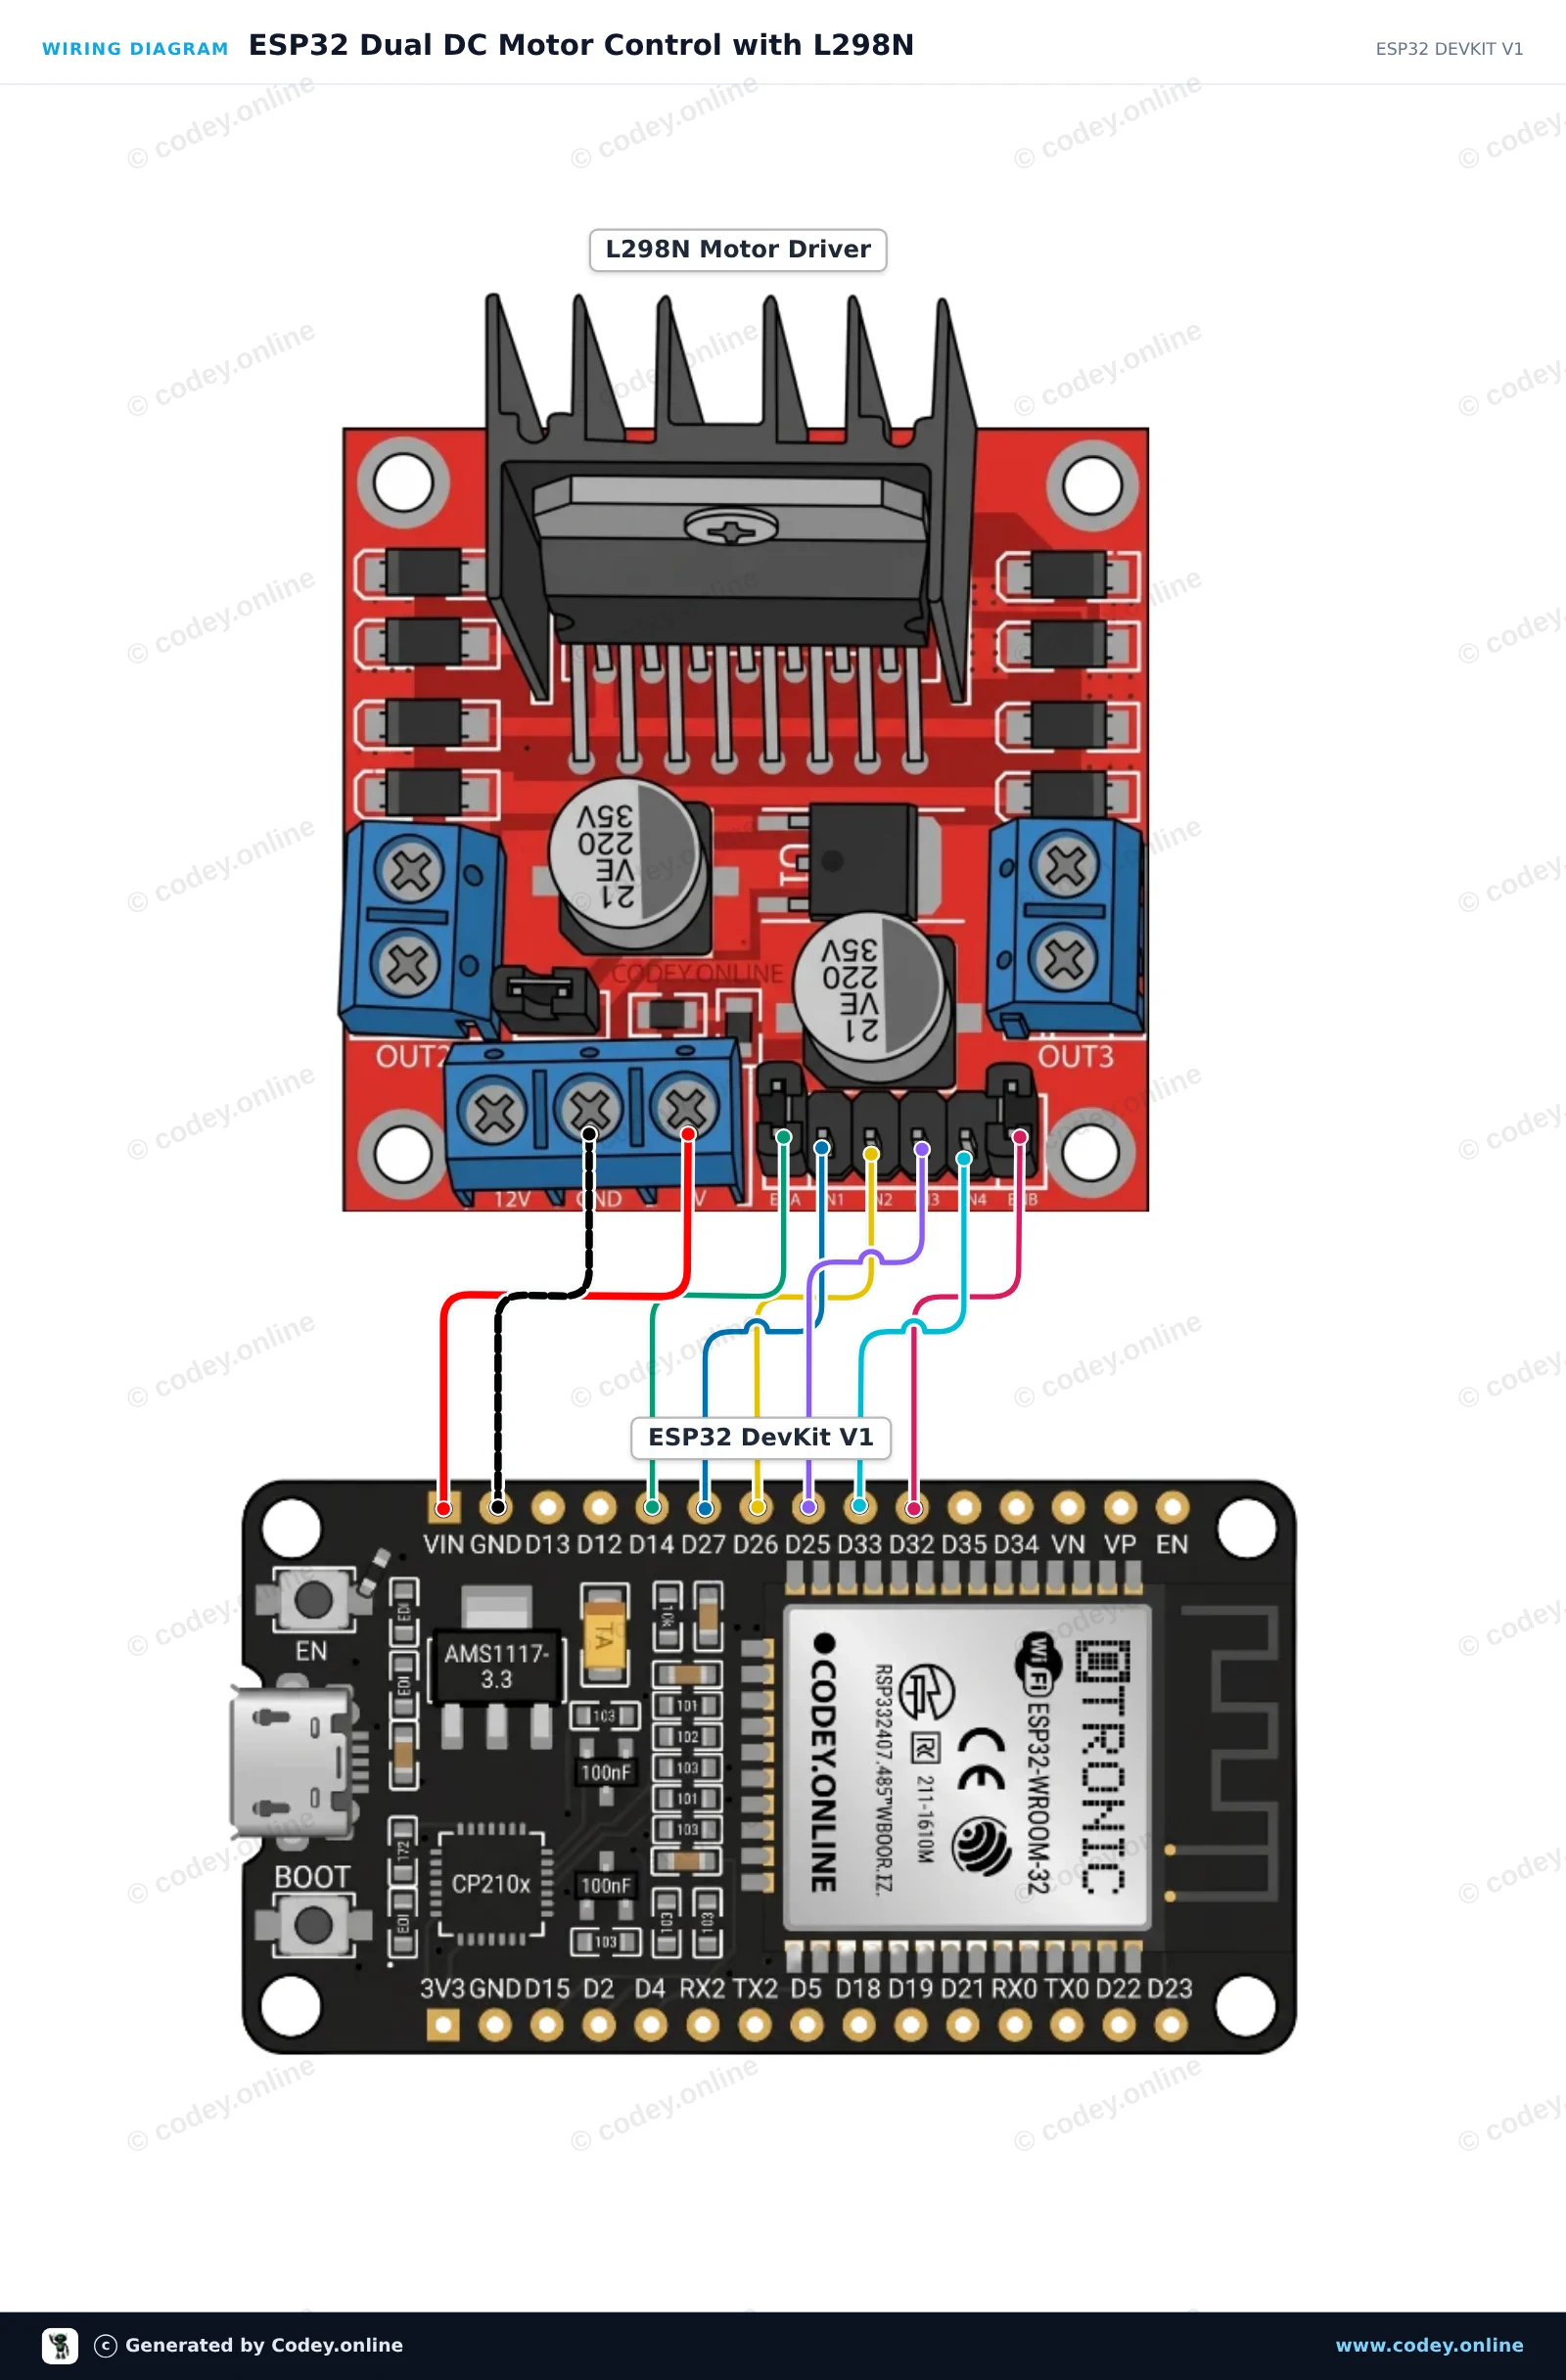
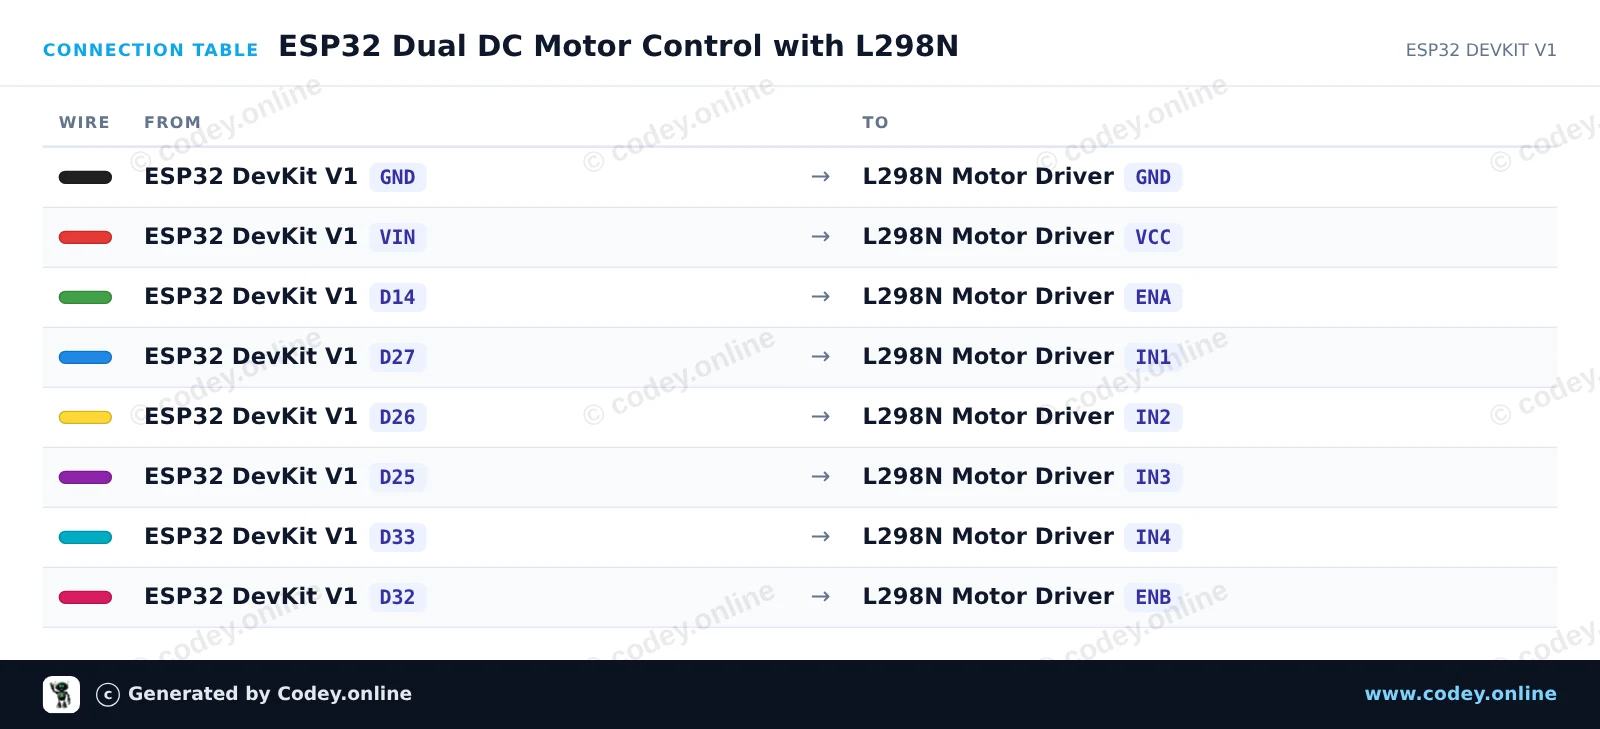
/*
 * ==================================================================
 *  Generated by Codey.online  —  https://www.codey.online
 * ==================================================================
 *  Project   : ESP32 Dual DC Motor Control with L298N
 *  Board     : ESP32 DEVKIT V1 (esp32:esp32:esp32doit-devkit-v1)
 *  Parts     : L298N Motor Driver Board
 *  Libraries : none (built-in)
 *
 *  Codey Online is an AI-powered browser IDE for Arduino and ESP32.
 *  Describe your project and Codey writes the code, draws the wiring
 *  diagram and uploads it to your board, straight from the browser.
 *  This code is free to use, modify and share, without warranty.
 * ==================================================================
 */

const int ENA_PIN = 14;
const int IN1_PIN = 27;
const int IN2_PIN = 26;
const int IN3_PIN = 25;
const int IN4_PIN = 33;
const int ENB_PIN = 32;

void setMotors(int speedA, int dirA, int speedB, int dirB) {
  // Motor A direction
  if (dirA > 0) {
    digitalWrite(IN1_PIN, HIGH);
    digitalWrite(IN2_PIN, LOW);
  } else if (dirA < 0) {
    digitalWrite(IN1_PIN, LOW);
    digitalWrite(IN2_PIN, HIGH);
  } else {
    digitalWrite(IN1_PIN, LOW);
    digitalWrite(IN2_PIN, LOW);
  }
  analogWrite(ENA_PIN, speedA);

  // Motor B direction
  if (dirB > 0) {
    digitalWrite(IN3_PIN, HIGH);
    digitalWrite(IN4_PIN, LOW);
  } else if (dirB < 0) {
    digitalWrite(IN3_PIN, LOW);
    digitalWrite(IN4_PIN, HIGH);
  } else {
    digitalWrite(IN3_PIN, LOW);
    digitalWrite(IN4_PIN, LOW);
  }
  analogWrite(ENB_PIN, speedB);
}

void setup() {
  Serial.begin(115200);
  pinMode(ENA_PIN, OUTPUT);
  pinMode(IN1_PIN, OUTPUT);
  pinMode(IN2_PIN, OUTPUT);
  pinMode(IN3_PIN, OUTPUT);
  pinMode(IN4_PIN, OUTPUT);
  pinMode(ENB_PIN, OUTPUT);
  Serial.println("L298N Motor Driver Initialized");
}

void loop() {
  // Drive forward
  Serial.println("Moving Forward");
  setMotors(200, 1, 200, 1);
  delay(2000);

  // Stop
  Serial.println("Stopping");
  setMotors(0, 0, 0, 0);
  delay(1000);

  // Drive backward
  Serial.println("Moving Backward");
  setMotors(200, -1, 200, -1);
  delay(2000);

  // Stop
  Serial.println("Stopping");
  setMotors(0, 0, 0, 0);
  delay(1000);

  // Speed ramp up
  Serial.println("Ramping Speed Forward");
  for (int spd = 0; spd <= 255; spd += 15) {
    setMotors(spd, 1, spd, 1);
    delay(100);
  }
  delay(500);
  setMotors(0, 0, 0, 0);
  delay(1500);
}Wiring diagram and example code generated by Codey.online — https://www.codey.online





 English
  Nederlands
  Frans
Frans  Italiano
  Español
  Suomi
Suomi  Polski
  Dansk
Dansk  Ελληνικά
  Български
  Čeština
  Hrvatski
  Aileen