SKU: OT2371-B13 Artikelnummer: NA330 EAN: 8321317104642

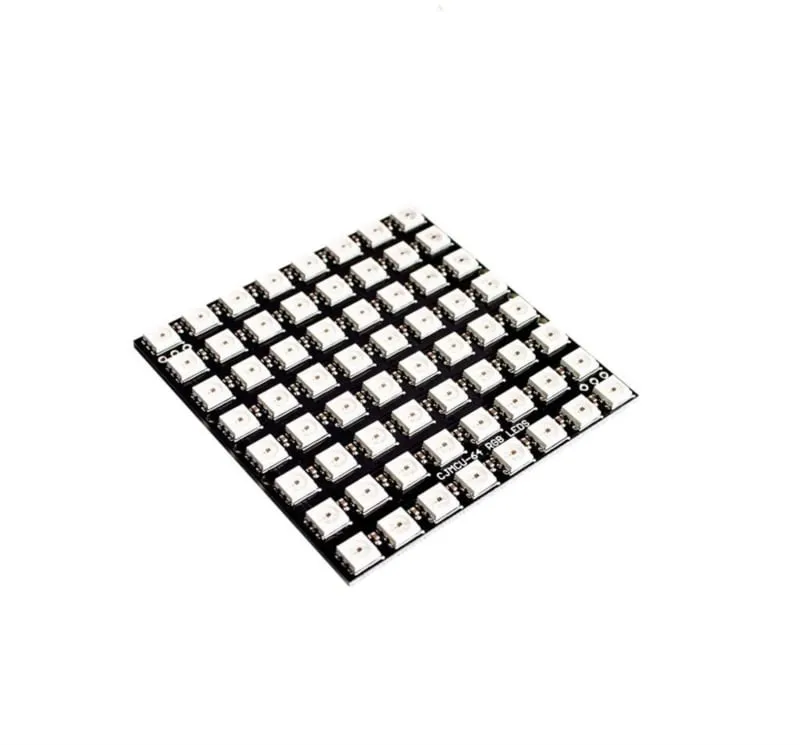
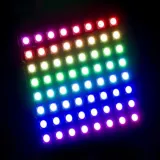
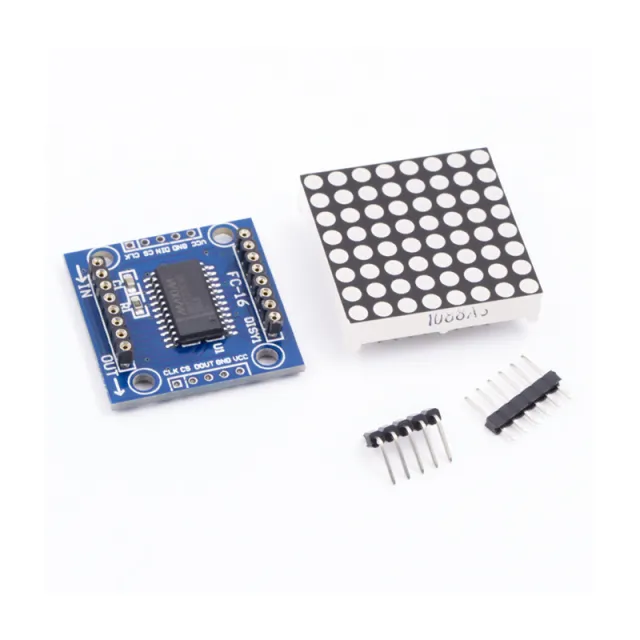
RGB LED-Matrix mit 64 adressierbaren WS2812b-LEDs.
Funktioniert mit 5V und kann über Arduino, ESP8266 und ESP32 angesteuert werden.
Abmessungen
Länge: 6,5cm
Breite: 6,5cm
Höhe: 0,3cm
So schließt du den 8x8 RGB 64 LED Matrix 5V WS2812b an einen Arduino UNO oder ESP32 an, mit einem Beispiel-Sketch, den du direkt hochladen kannst.
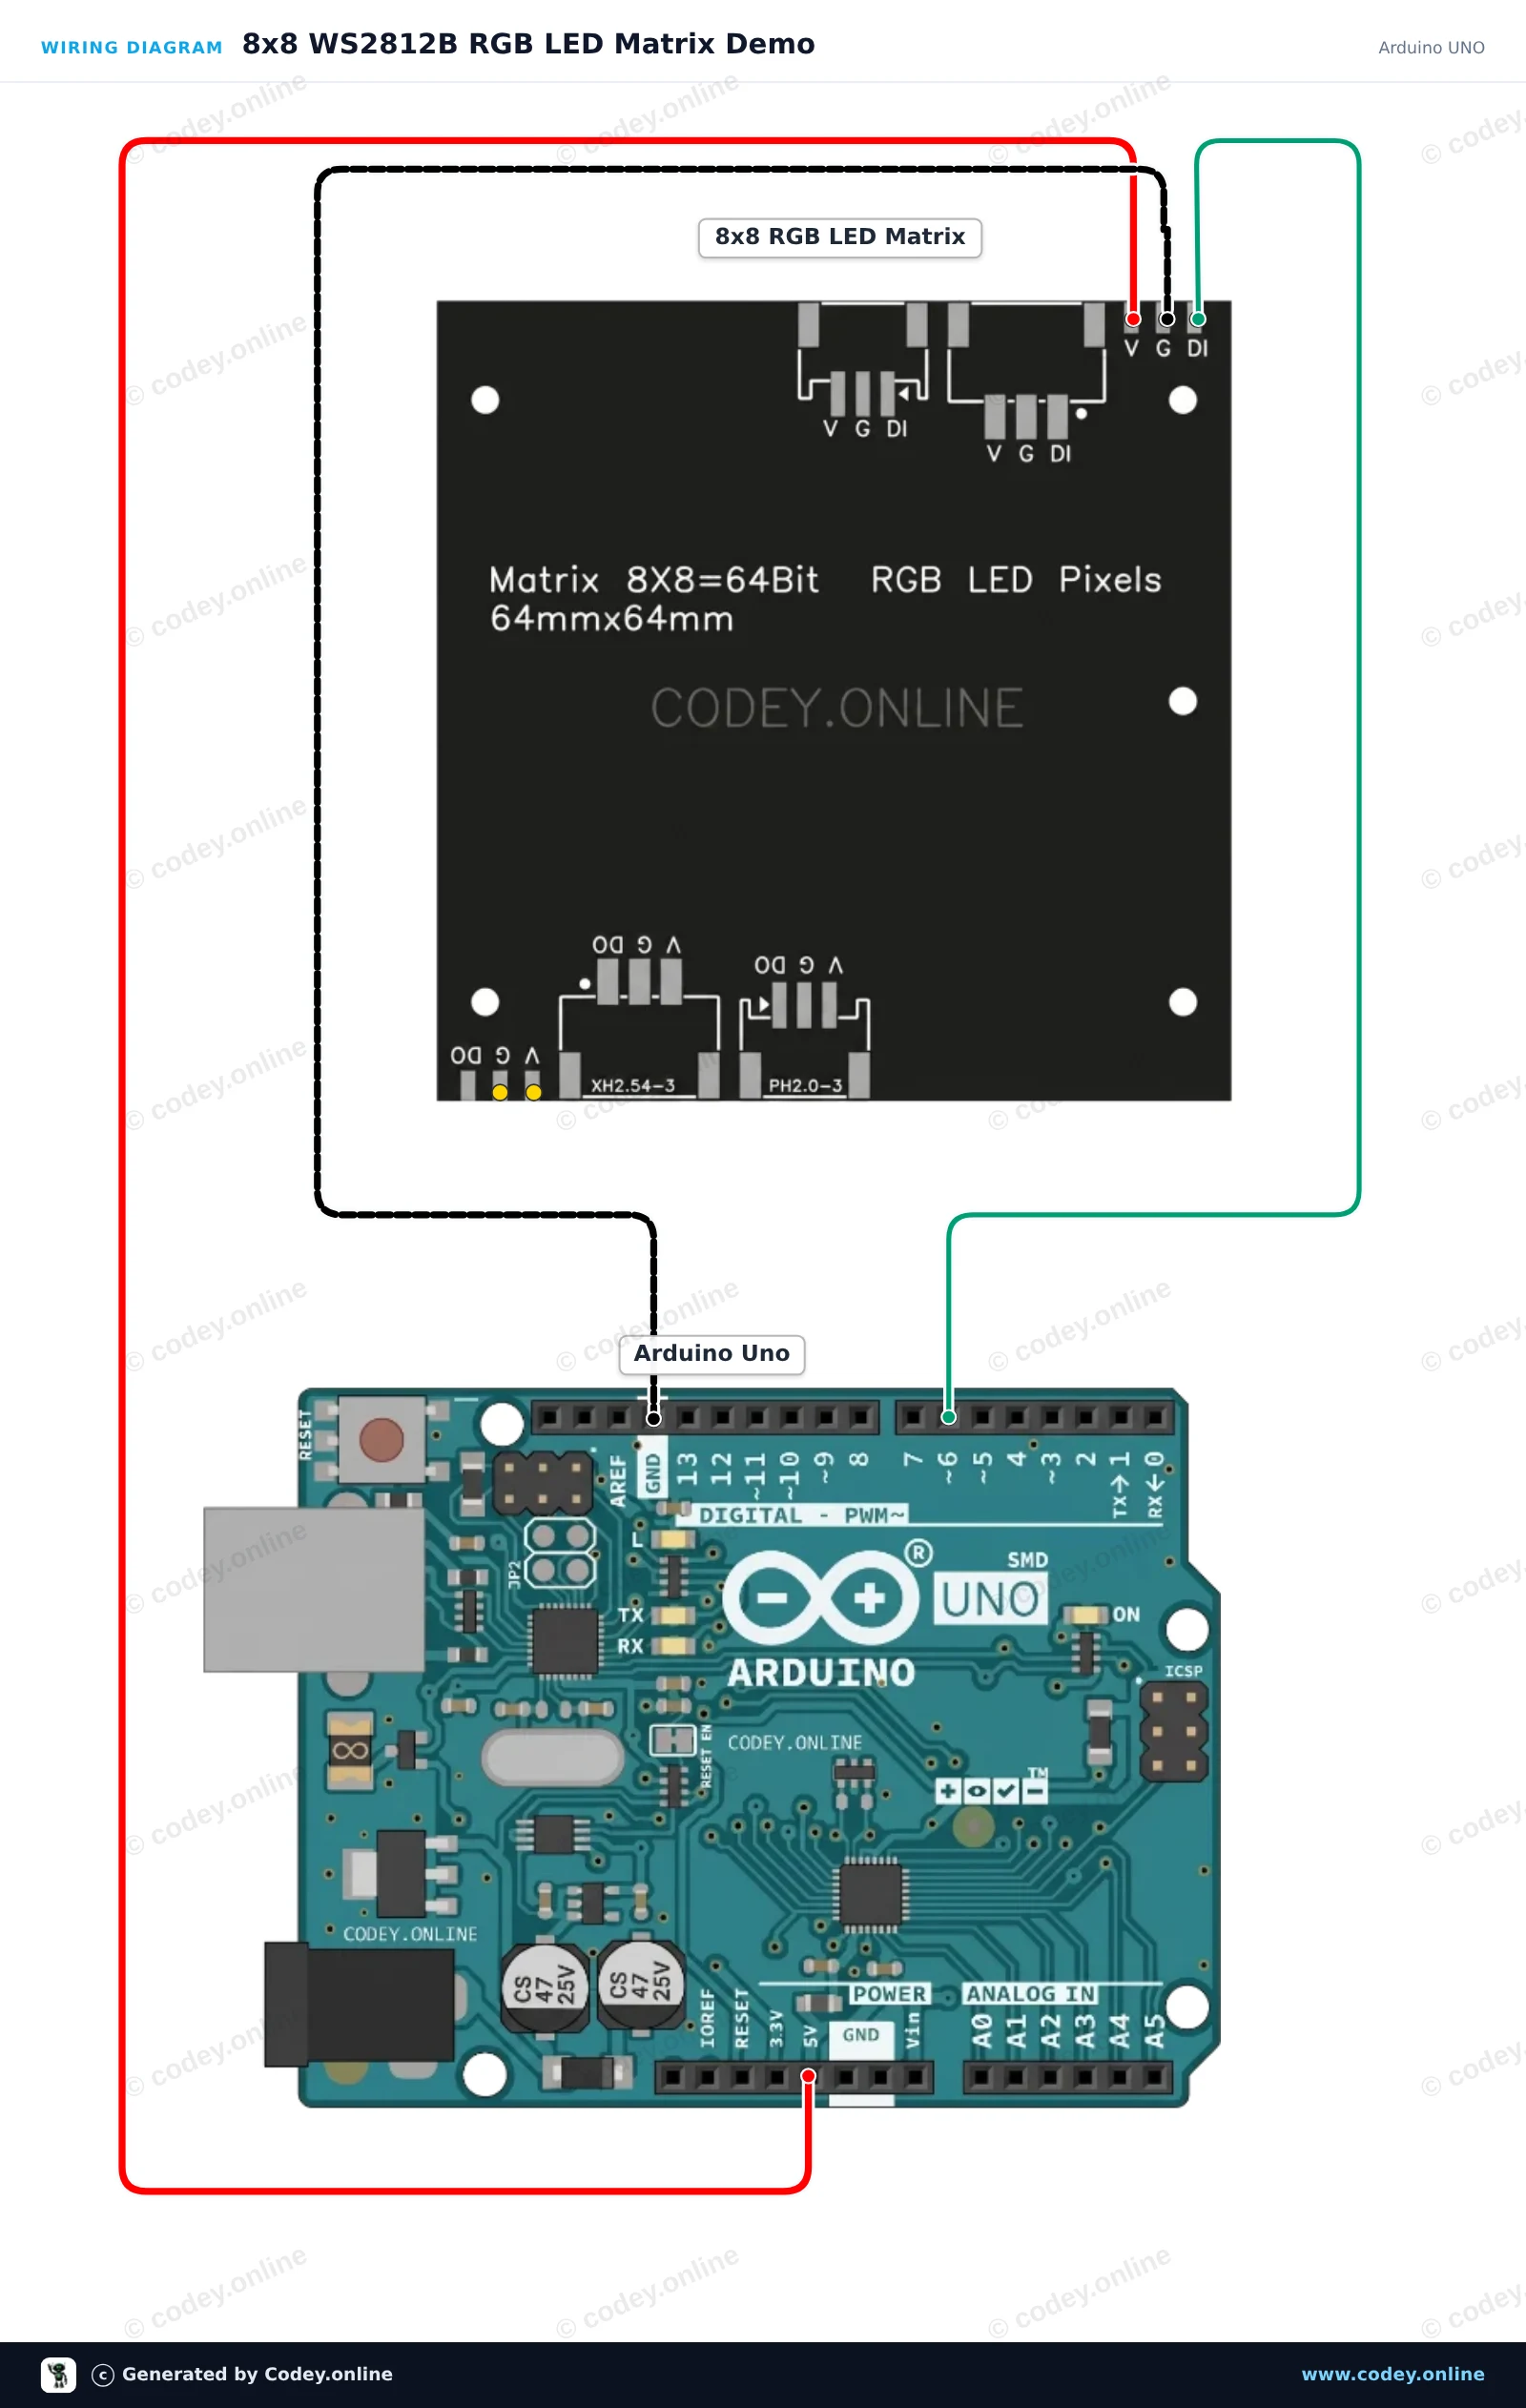
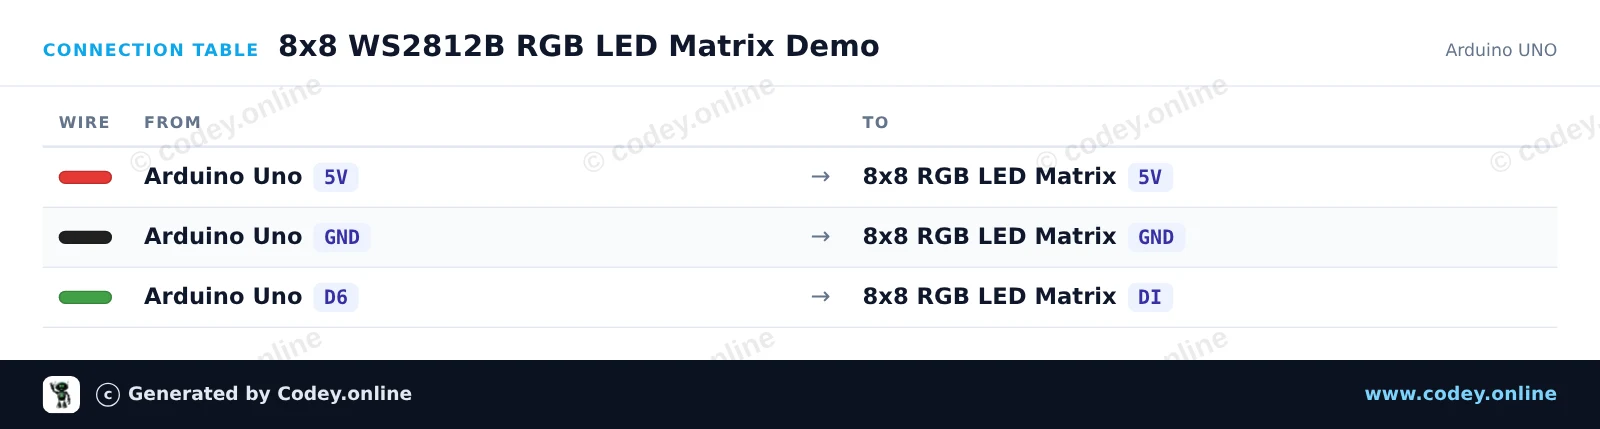
Dieses Projekt zeigt eine 8x8 WS2812B adressierbare RGB LED-Matrix, die direkt an ein Arduino Uno angeschlossen ist. Der Sketch initialisiert die 64 LEDs und zeigt ein rotierendes Farbmuster über die Matrix bei einer sicheren Helligkeit. Verbinden Sie die 5V-, GND- und DI-Pins wie gezeigt, um Ihre Matrix in wenigen Minuten zu testen.
/*
 * ==================================================================
 *  Generated by Codey.online  —  https://www.codey.online
 * ==================================================================
 *  Project   : 8x8 WS2812B RGB LED Matrix Demo
 *  Board     : Arduino UNO (arduino:avr:uno)
 *  Parts     : 8x8 RGB 64 LED Matrix 5V WS2812b
 *  Libraries : Adafruit NeoPixel 1.15.5
 *
 *  Codey Online is an AI-powered browser IDE for Arduino and ESP32.
 *  Describe your project and Codey writes the code, draws the wiring
 *  diagram and uploads it to your board, straight from the browser.
 *  This code is free to use, modify and share, without warranty.
 * ==================================================================
 */

#include <Adafruit_NeoPixel.h>

#define LED_PIN   6
#define LED_COUNT 64

Adafruit_NeoPixel matrix(LED_COUNT, LED_PIN, NEO_GRB + NEO_KHZ800);

// Converts (x, y) coordinates to pixel index (serpentine layout)
uint16_t getPixelIndex(uint8_t x, uint8_t y) {
  if (y % 2 == 0) {
    return y * 8 + x;
  } else {
    return y * 8 + (7 - x);
  }
}

void setup() {
  Serial.begin(115200);
  matrix.begin();
  matrix.setBrightness(30); // Keep brightness low when powered from Arduino 5V
  matrix.show();            // Turn off all pixels
  Serial.println(F("WS2812B 8x8 LED Matrix ready!"));
}

void loop() {
  static uint16_t hueOffset = 0;

  for (uint8_t y = 0; y < 8; y++) {
    for (uint8_t x = 0; x < 8; x++) {
      uint16_t pixelHue = hueOffset + ((x + y) * 65536L / 16);
      uint32_t color = matrix.gamma32(matrix.ColorHSV(pixelHue));
      matrix.setPixelColor(getPixelIndex(x, y), color);
    }
  }

  matrix.show();
  hueOffset += 500;
  delay(20);
}Benötigte Bibliotheken: Adafruit NeoPixel 1.15.5
Wiring diagram and example code generated by Codey.online — https://www.codey.online
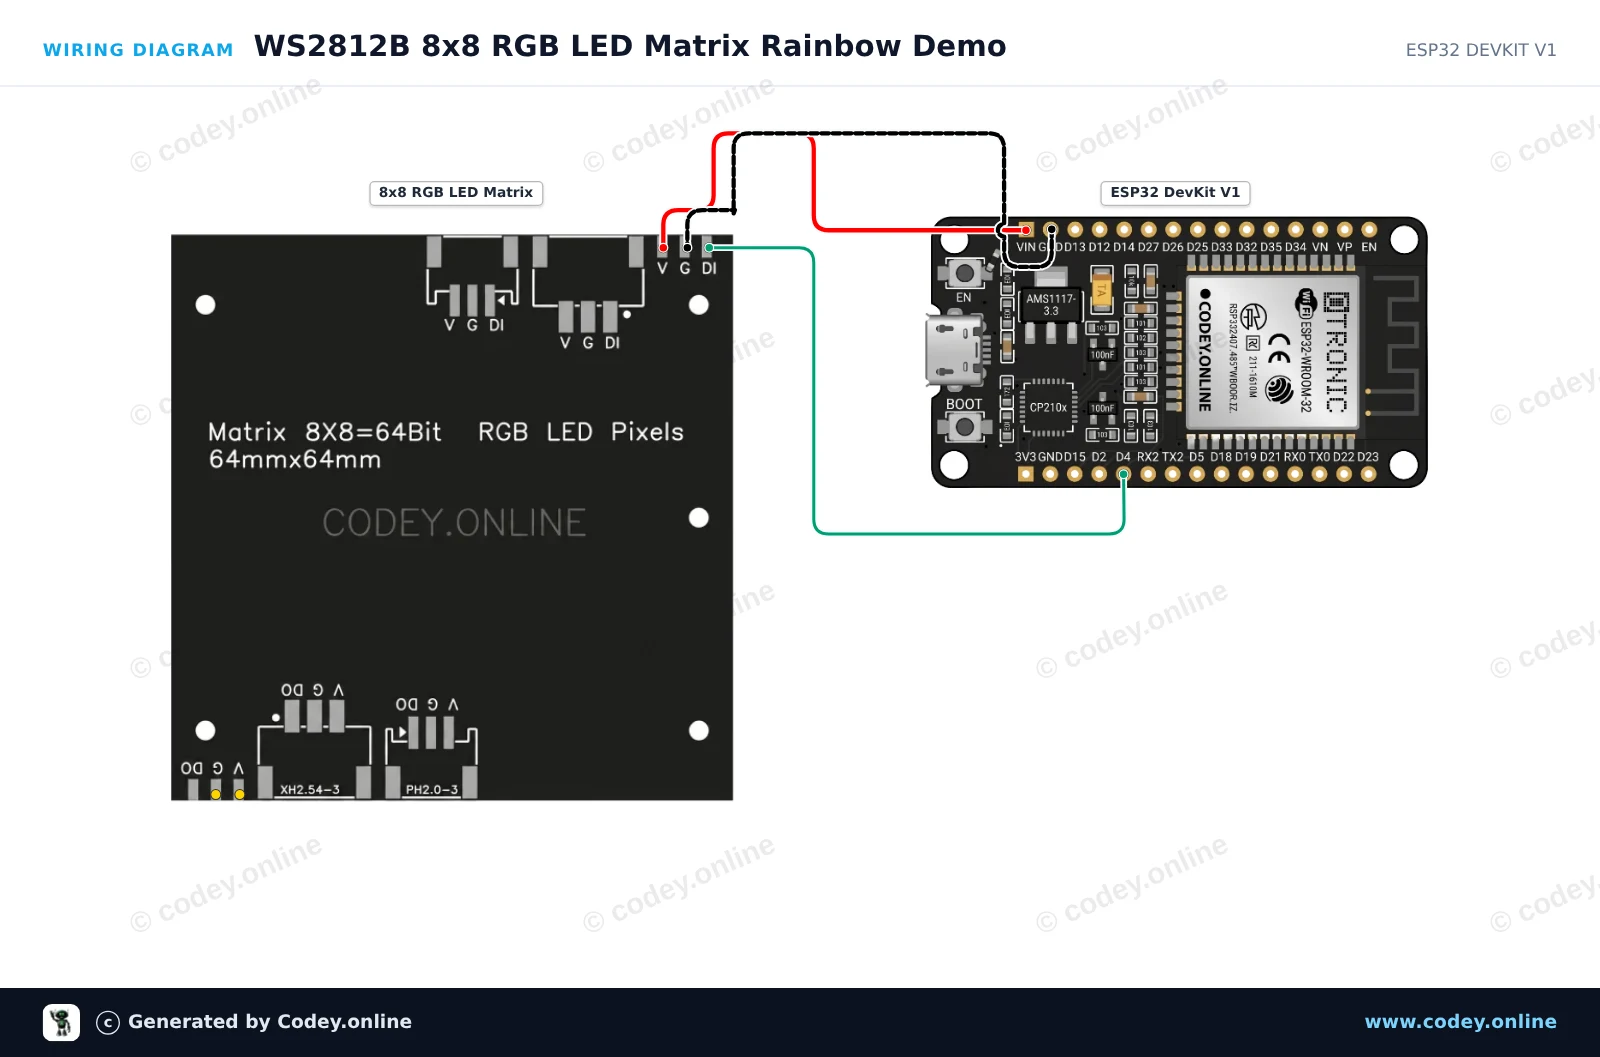
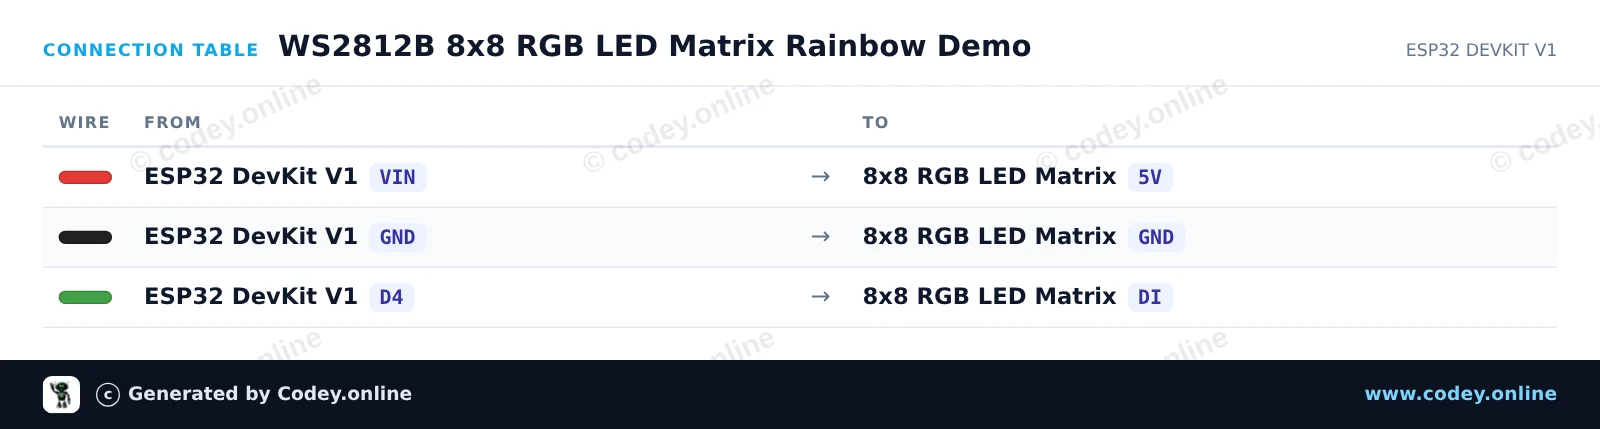
Dieses Projekt steuert eine 8x8 WS2812B RGB LED-Matrix mit einem ESP32 an. Es durchläuft farbenfrohe Regenbogenmuster über alle 64 einzeln adressierbaren LEDs. Die Helligkeit ist niedrig eingestellt, um einen sicheren Betrieb direkt über USB-Strom zu gewährleisten.
/*
 * ==================================================================
 *  Generated by Codey.online  —  https://www.codey.online
 * ==================================================================
 *  Project   : WS2812B 8x8 RGB LED Matrix Rainbow Demo
 *  Board     : ESP32 DEVKIT V1 (esp32:esp32:esp32doit-devkit-v1)
 *  Parts     : 8x8 RGB 64 LED Matrix 5V WS2812b
 *  Libraries : Adafruit NeoPixel 1.15.5
 *
 *  Codey Online is an AI-powered browser IDE for Arduino and ESP32.
 *  Describe your project and Codey writes the code, draws the wiring
 *  diagram and uploads it to your board, straight from the browser.
 *  This code is free to use, modify and share, without warranty.
 * ==================================================================
 */

#include <Adafruit_NeoPixel.h>

#define LED_PIN    4
#define LED_COUNT  64
#define BRIGHTNESS 30

Adafruit_NeoPixel matrix(LED_COUNT, LED_PIN, NEO_GRB + NEO_KHZ800);

void setup() {
  Serial.begin(115200);
  matrix.begin();
  matrix.setBrightness(BRIGHTNESS);
  matrix.show();
  Serial.println("WS2812B 8x8 Matrix Initialized");
}

void loop() {
  // Rainbow cycle across the matrix
  for (long firstPixelHue = 0; firstPixelHue < 5 * 65536; firstPixelHue += 256) {
    for (int i = 0; i < matrix.numPixels(); i++) {
      int pixelHue = firstPixelHue + (i * 65536L / matrix.numPixels());
      matrix.setPixelColor(i, matrix.gamma32(matrix.ColorHSV(pixelHue)));
    }
    matrix.show();
    delay(15);
  }
}Benötigte Bibliotheken: Adafruit NeoPixel 1.15.5
Wiring diagram and example code generated by Codey.online — https://www.codey.online







 English
  Nederlands
  Frans
Frans  Italiano
  Español
  Suomi
Suomi  Polski
  Dansk
Dansk  Ελληνικά
  Български
  Čeština
  Hrvatski
  Aileen